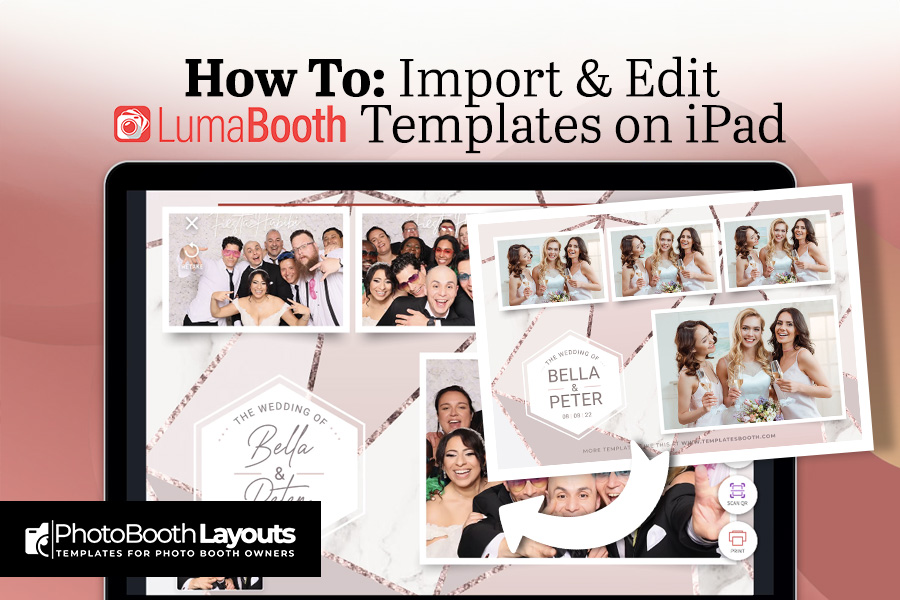
Step-by-Step: How to Import LumaBooth Templates on iPad and Edit Them
Want to learn how to import LumaBooth templates on iPad and create eye-catching photo booth prints? This comprehensive LumaBooth template import guide breaks down the entire process—from downloading your template files to discovering how to edit LumaBooth templates on iPad and customize layouts and text. Follow along, and you’ll be ready to wow your guests with beautiful, professional print designs in no time.
1. Get Your Template Files Ready
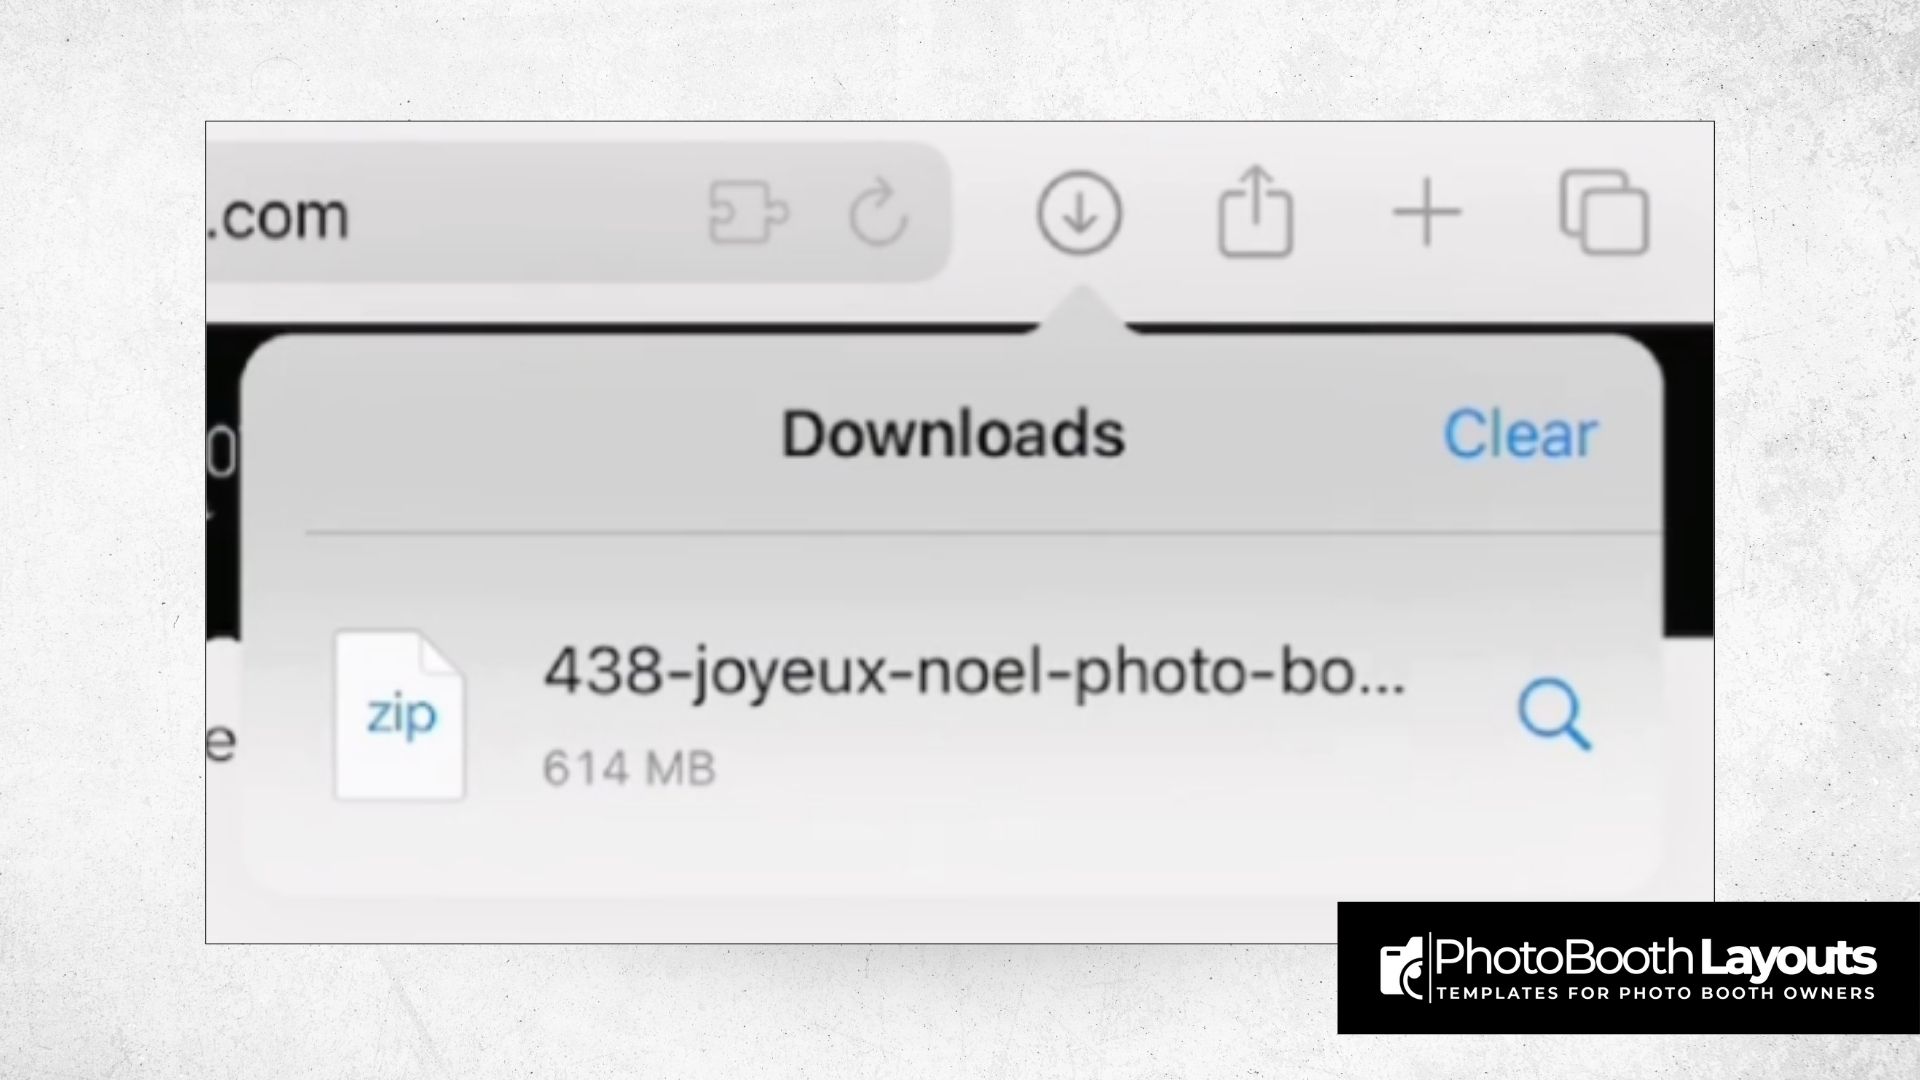
Before you import LumaBooth templates on iPad, ensure you have your template files ready. Many template vendors provide a ZIP file compatible with both LumaBooth and DSLR Booth apps, making it easy to customize photo booth templates iPad users love.
- Download the ZIP file for your chosen template.
- Save the file to your iPad—usually in the Files app under Downloads or a designated folder.
2. Unzip the Template Files
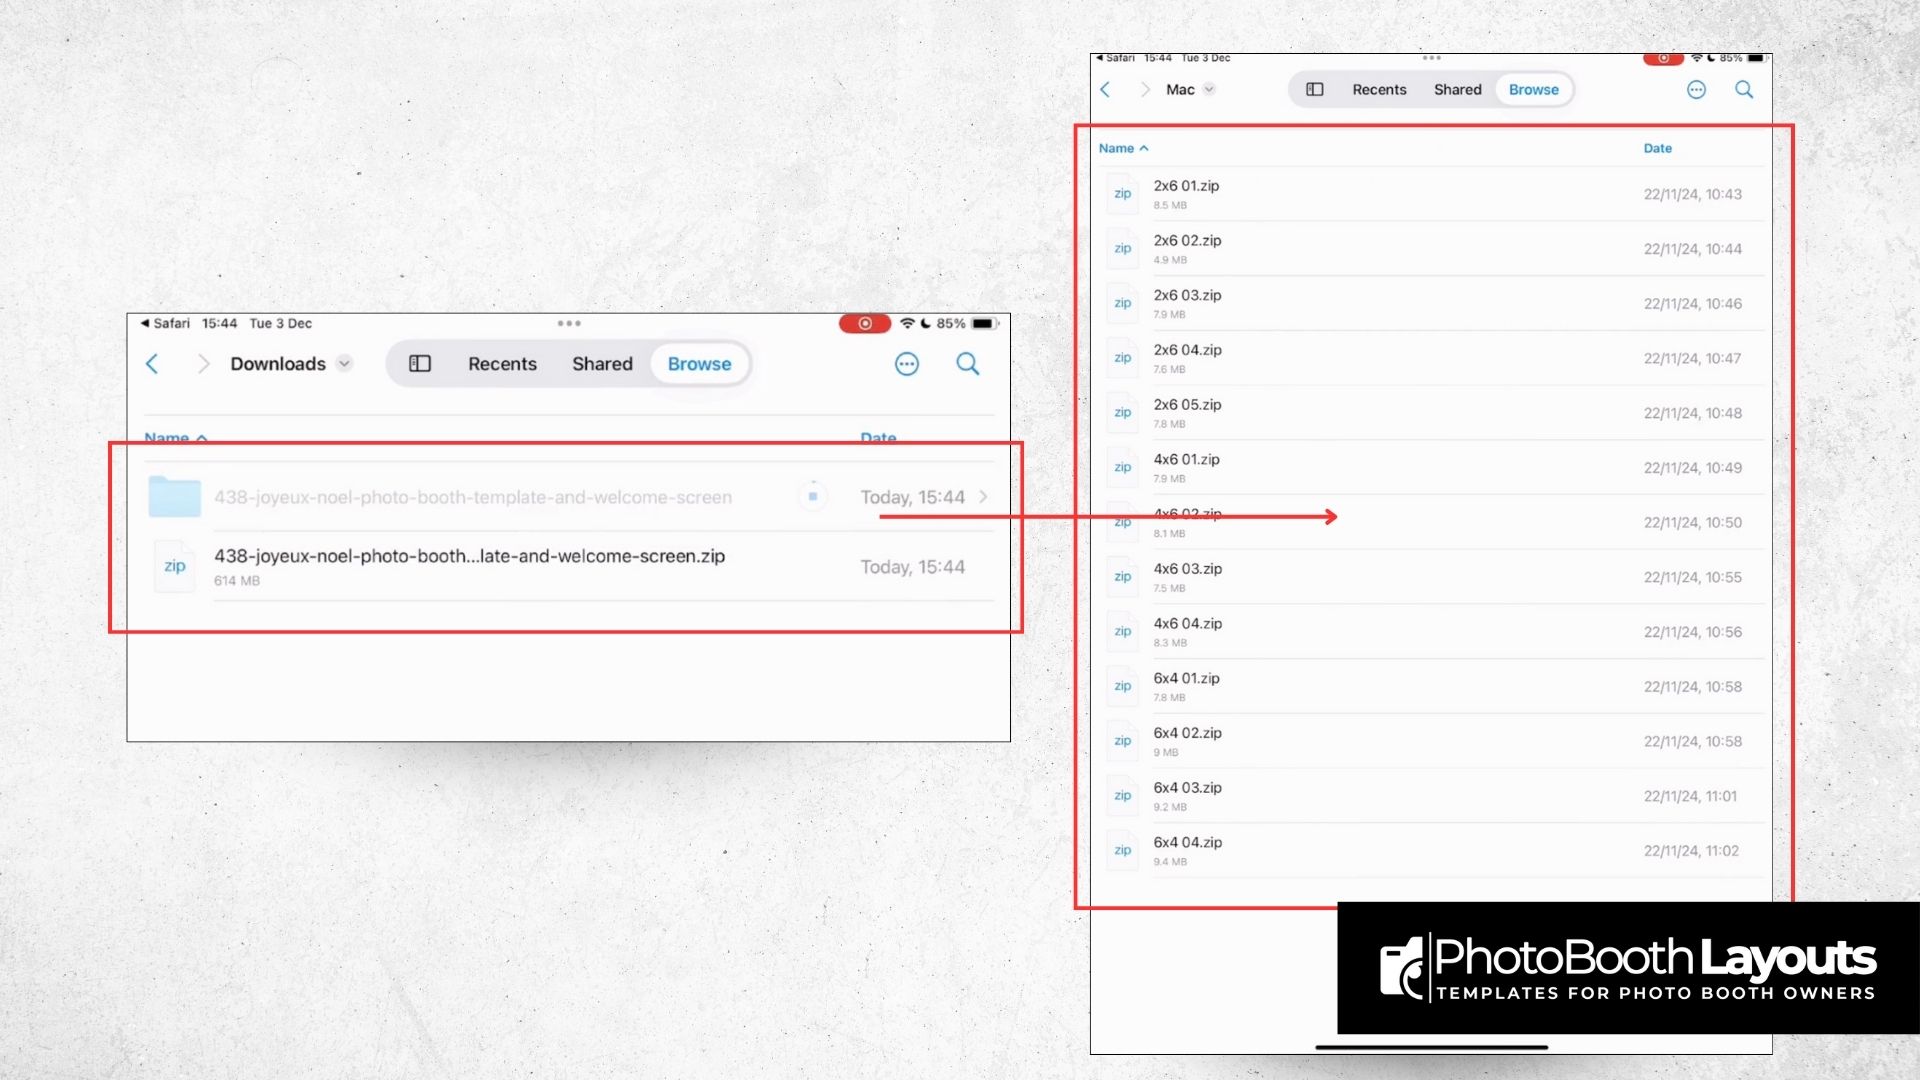
Once you have downloaded the ZIP, extract its contents to access your templates:
- Open your iPad’s Files app and find the downloaded ZIP file.
- Tap the ZIP file to automatically extract it.
- You’ll see a new folder containing all your template files ready for use.
3. Install All Required Fonts
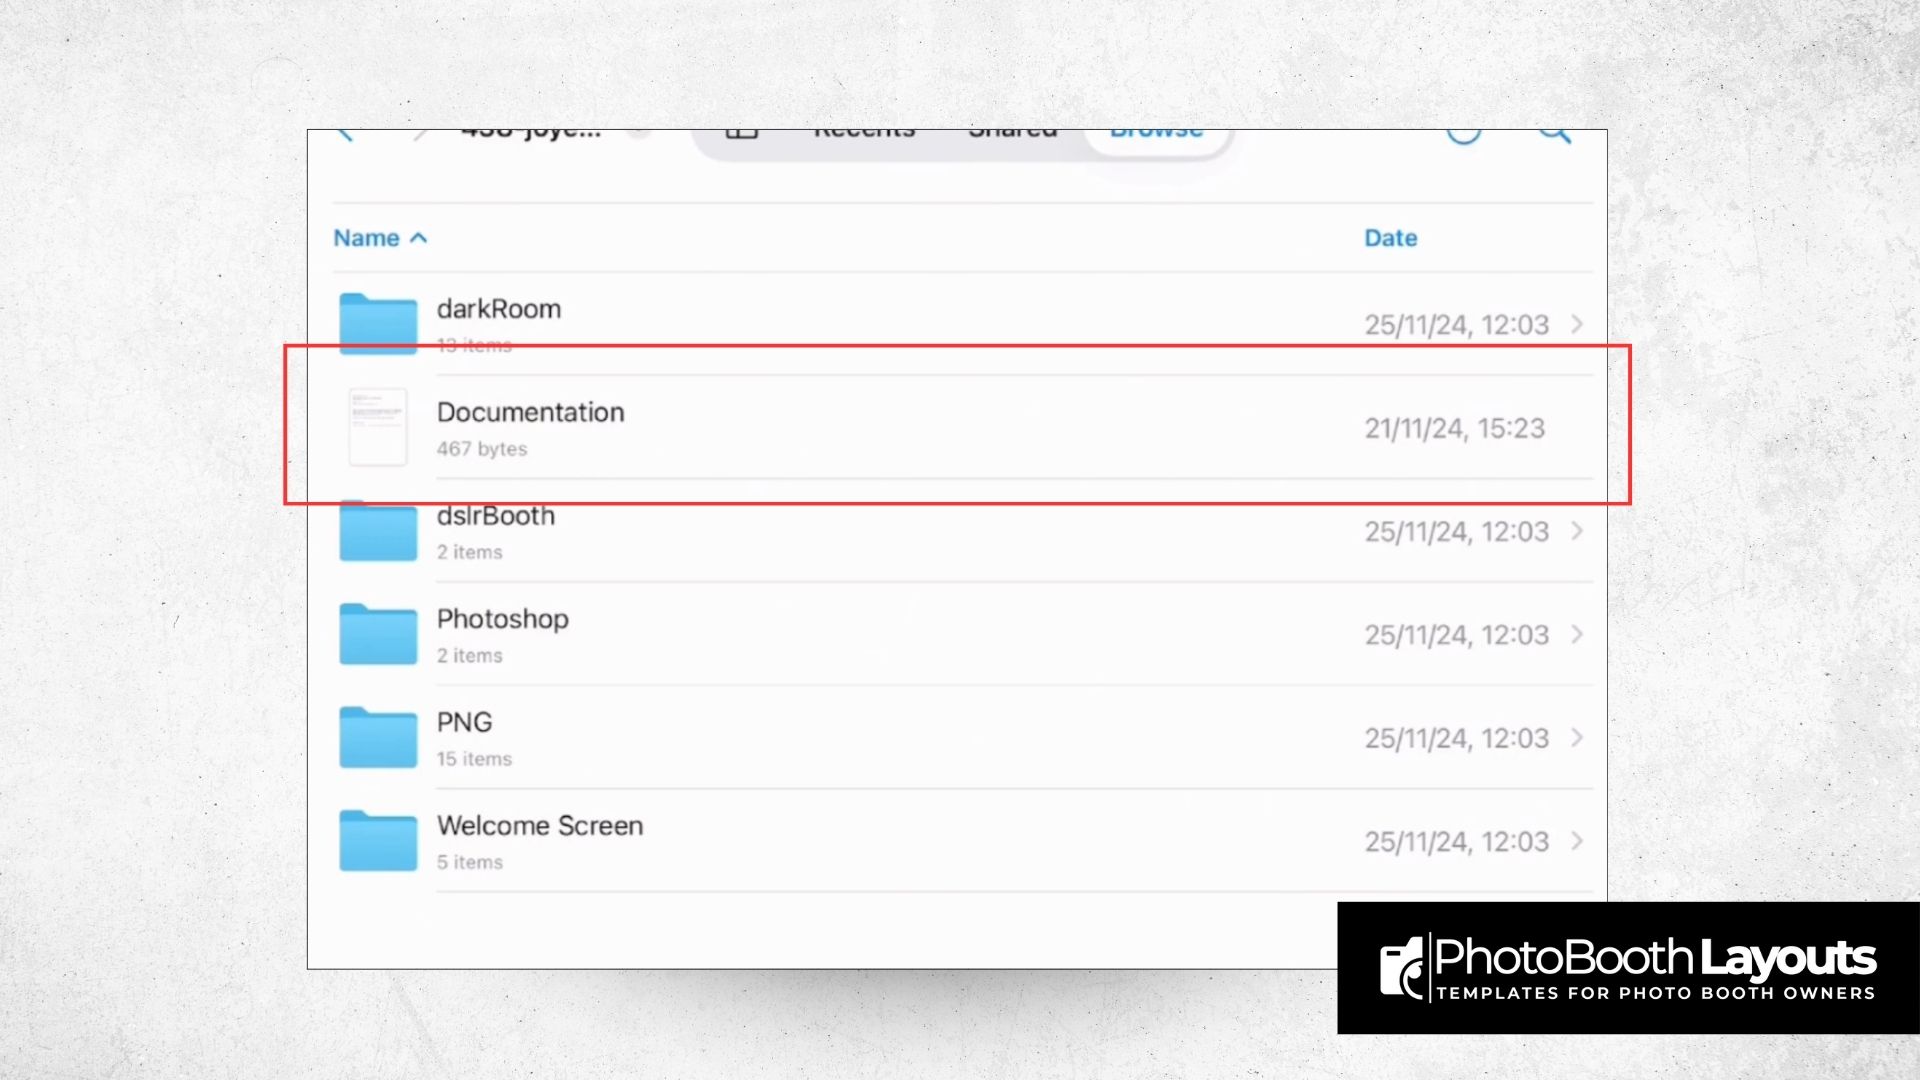 For your template to look perfect in LumaBooth, make sure all included fonts are installed on your iPad. Missing fonts can cause layout issues or broken designs.
- Look in your unzipped folder for font files (usually .ttf or .otf extensions).
- Install these fonts on your iPad. (If you’re unsure how, search for a guide on installing fonts on iOS—it typically involves using a font manager app or profile installation.)
4. Start a New Event in LumaBooth
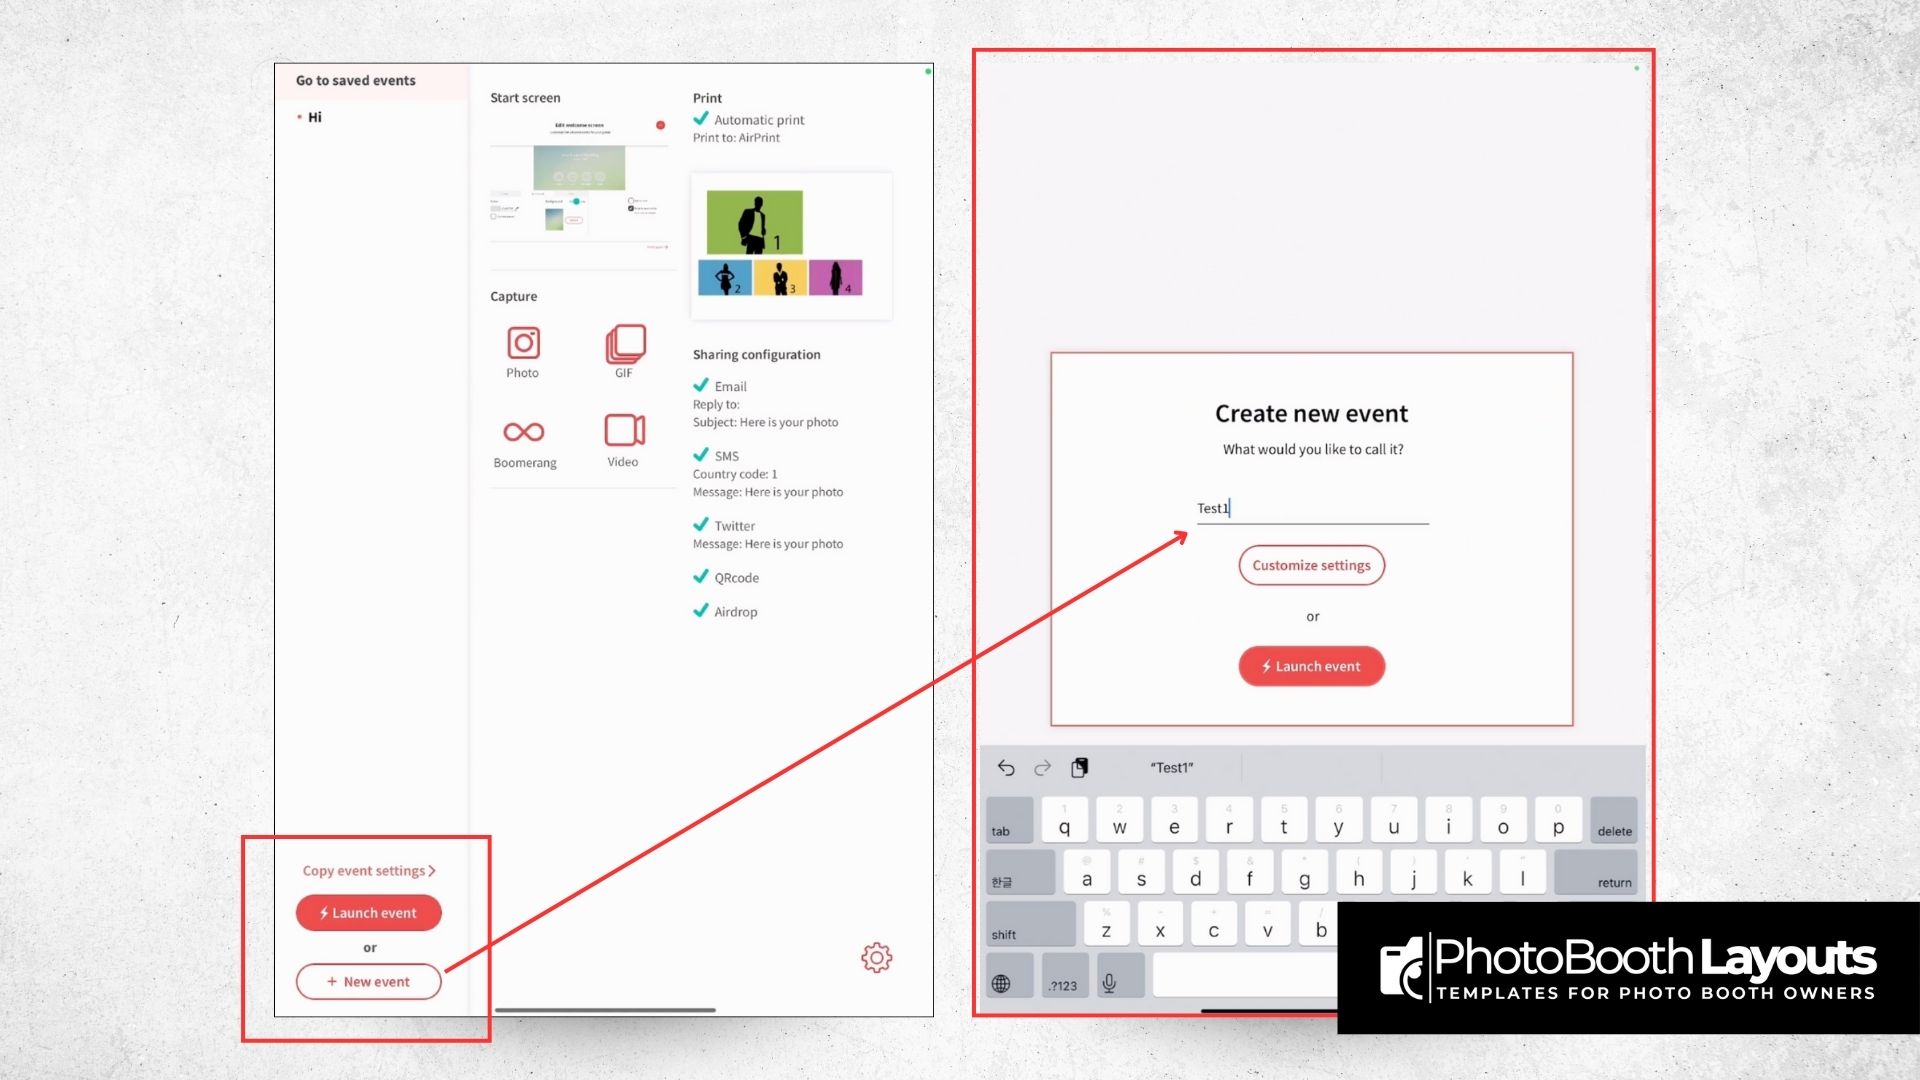 Now, open the LumaBooth app and set up your event:
- Open LumaBooth on your iPad.
- Tap “Create New Event” from the home screen.
- Enter a descriptive name for your event, then proceed to the Event Setup page.
5. Adjust Print Layout Settings
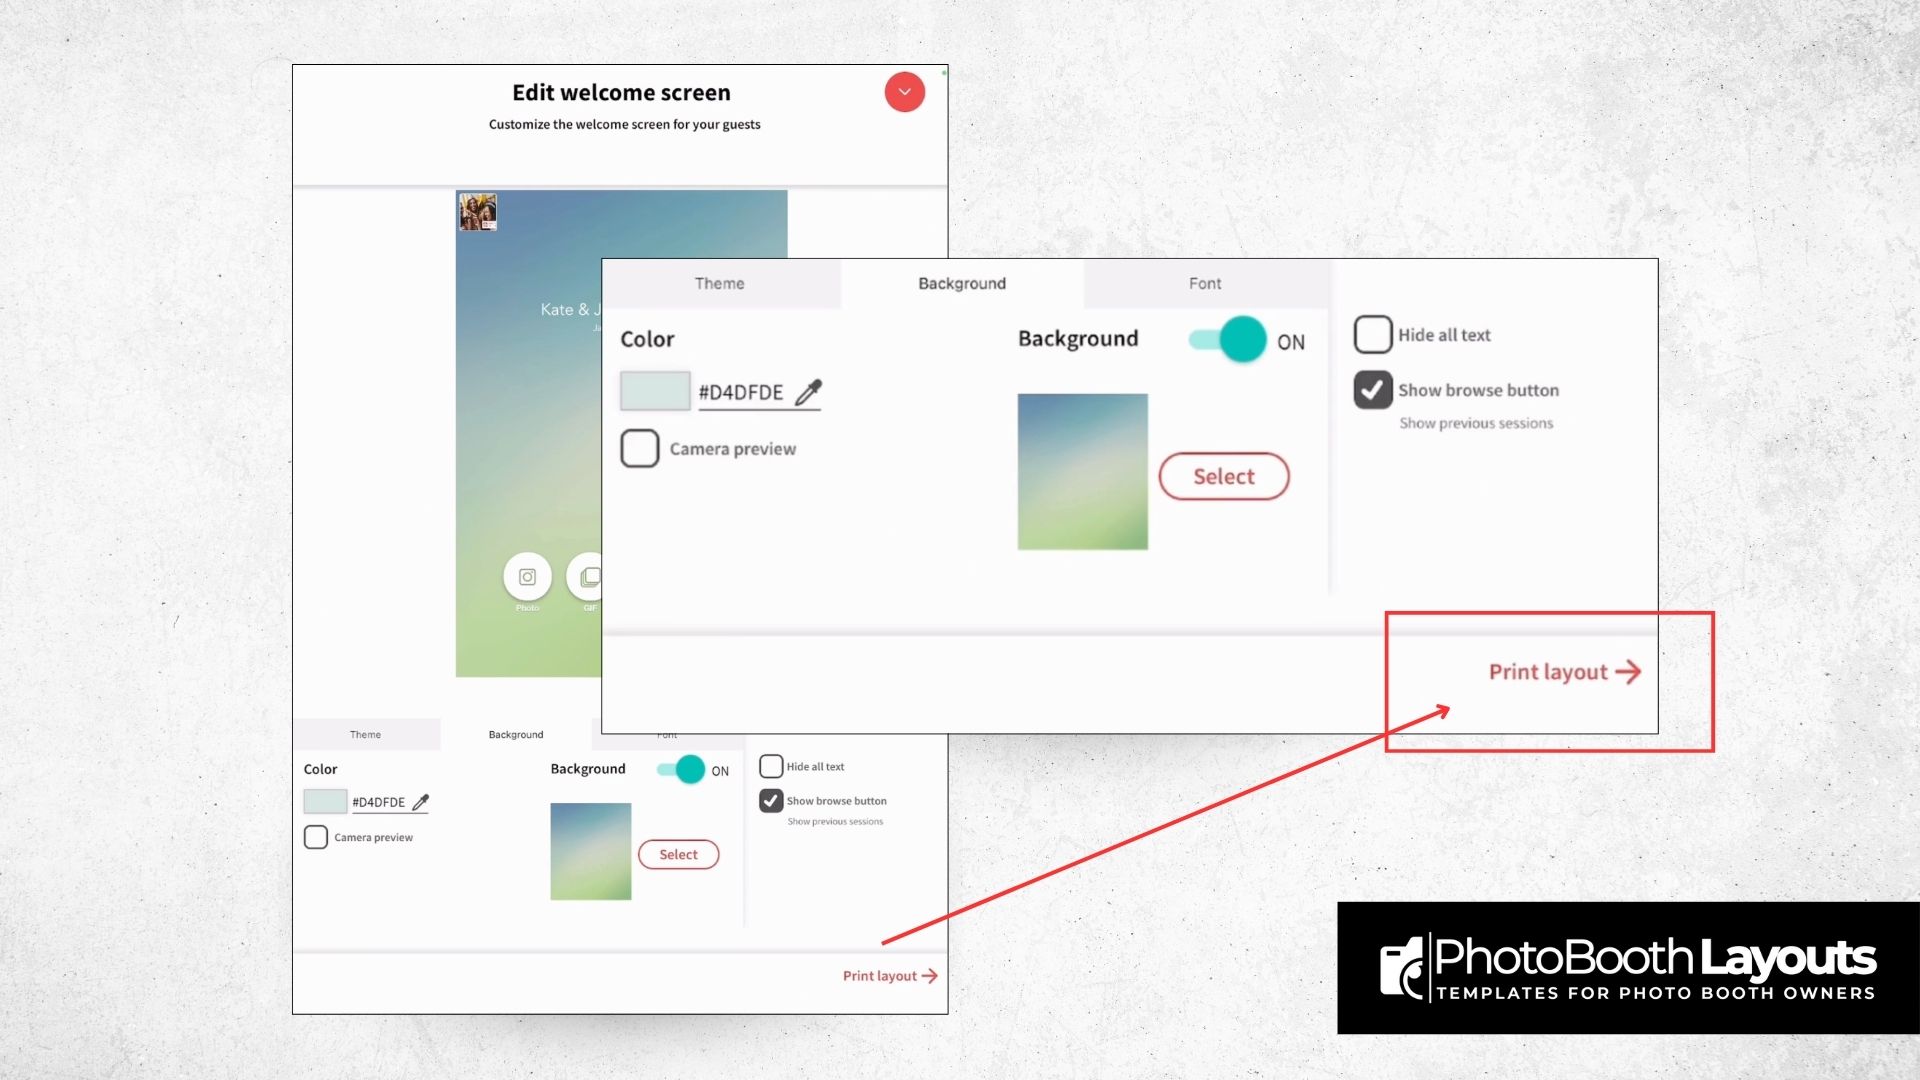
With your event created, it’s time to customize photo booth templates iPad users love:
- In your event, tap “Customize Settings” (or the equivalent button).
- Navigate to Print Layout for layout customization options.
- You’ll see layout templates and an Import button for adding your template.
6. Import Your Custom Template
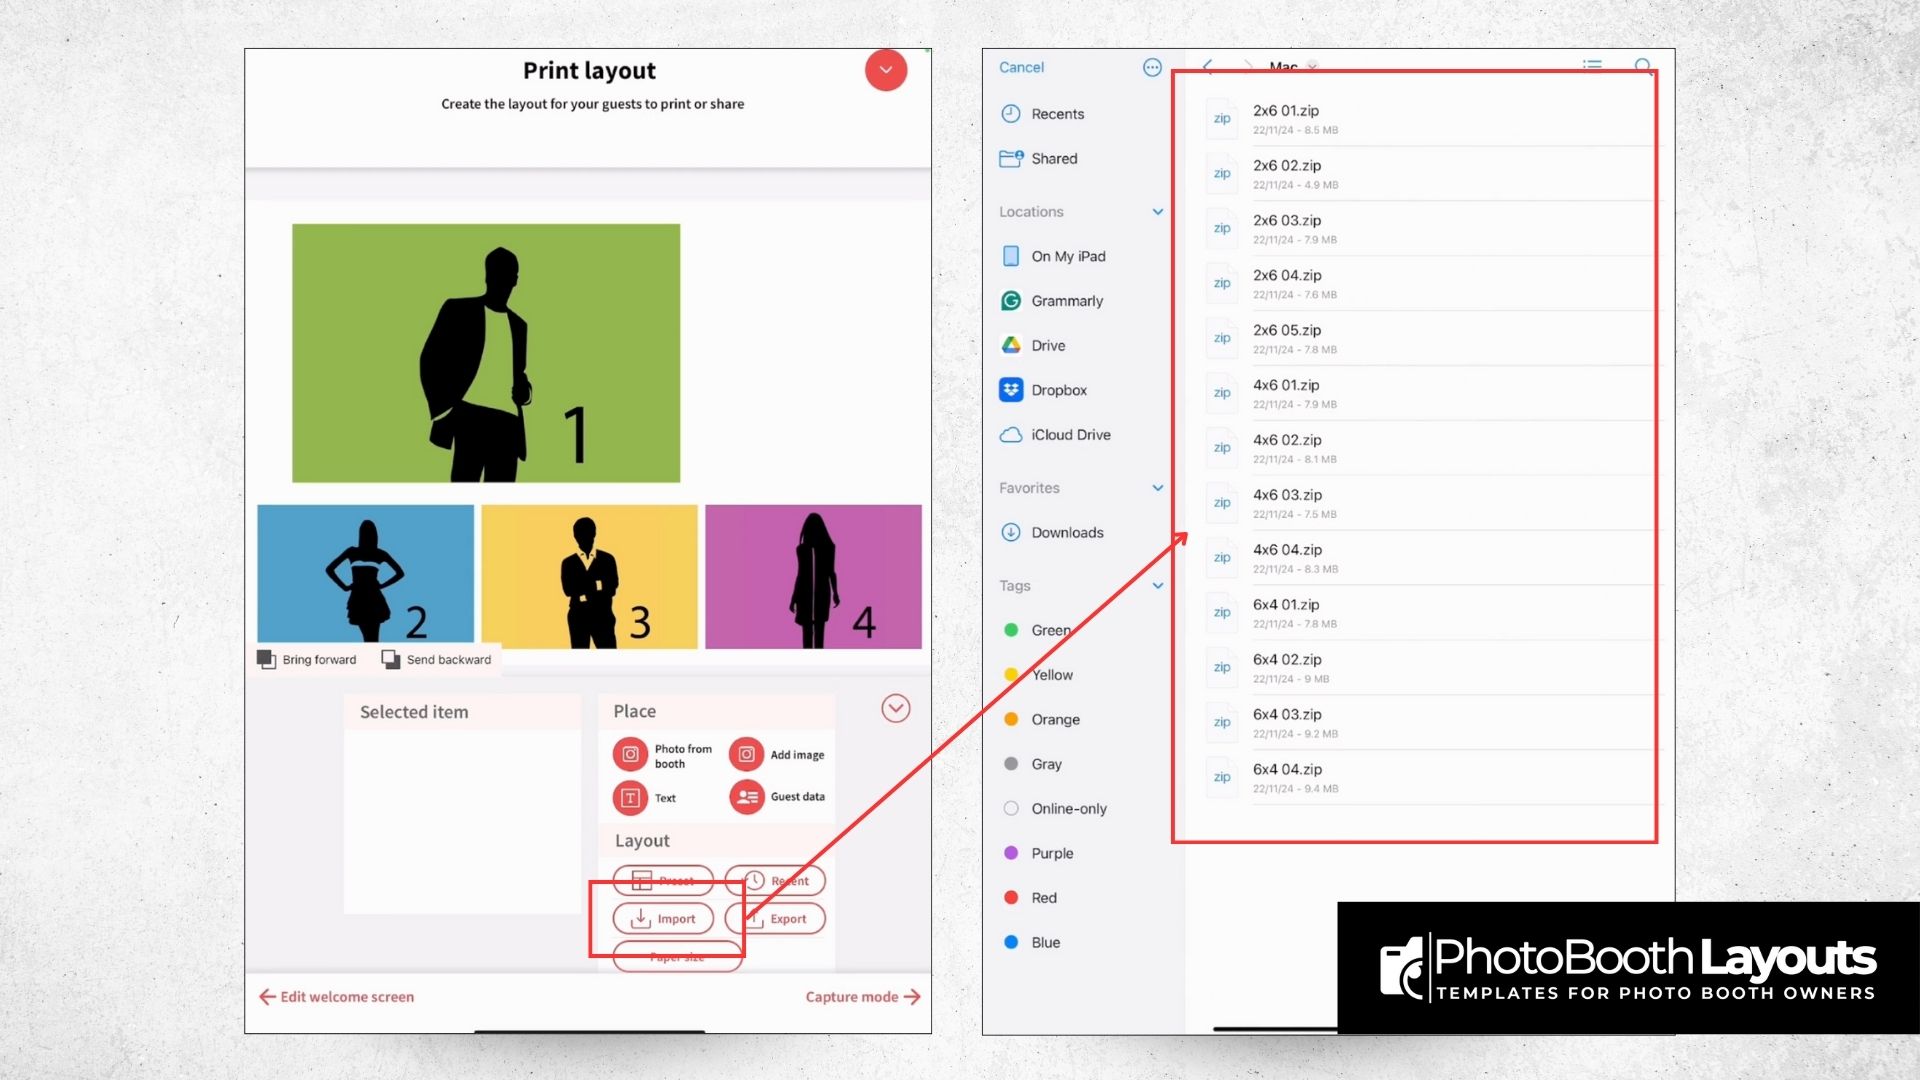
Now, import your template into LumaBooth on your iPad:
- Tap the Import button under Print Layout settings.
- When the file browser appears, navigate to the folder where you extracted your template files.
- Open the respective folder (often named “DSLRBooth” or similar), then select the Mac folder if required.
- Choose the template file you want to use, and it will be imported into LumaBooth.
7. Edit and Personalize the Template
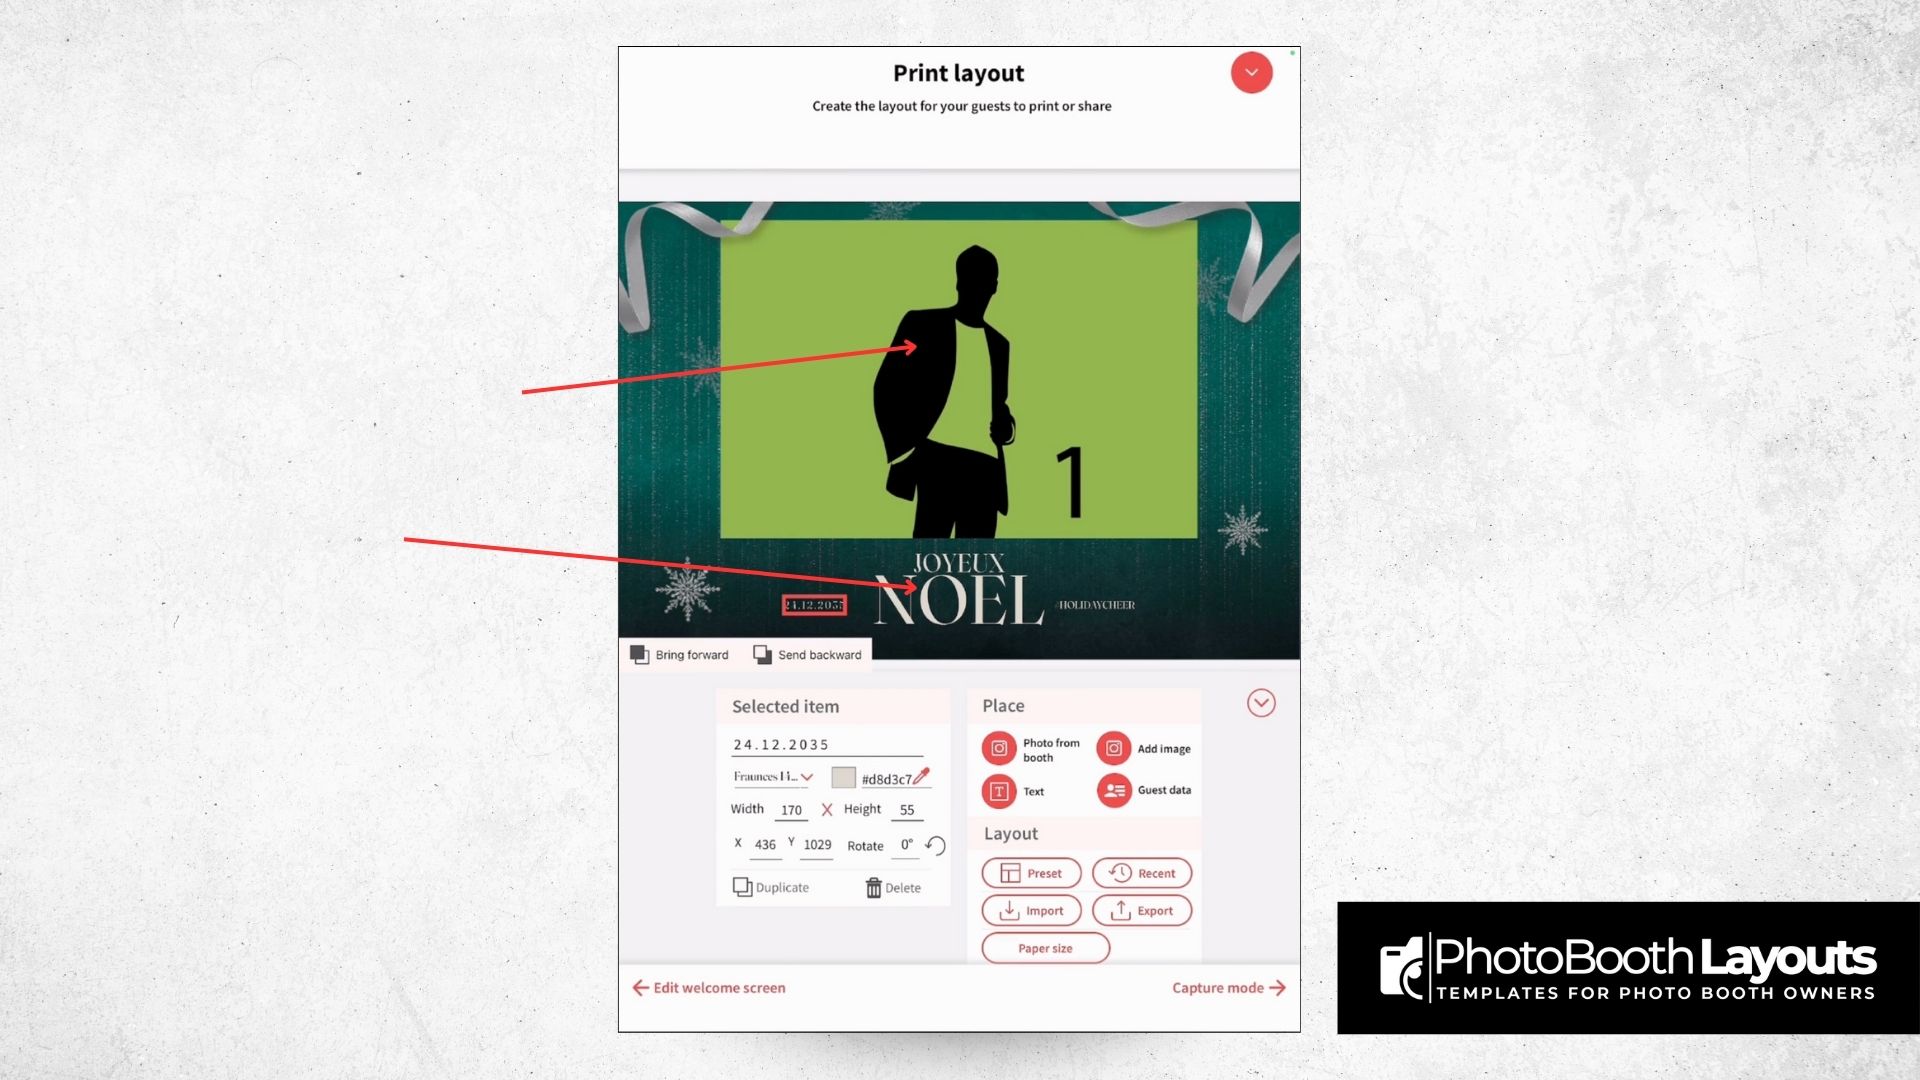
With your template loaded, it’s time to edit LumaBooth templates on iPad and make them your own:
- Adjust, move, or resize elements like text fields, graphics, or photo frames.
- Replace placeholder text with your own customized wording.
- If you wish to use another design, repeat the import steps and select a different template file.
Switching to a 2×6 Photo Strip
Want a 2×6 strip layout?
- Within print layout settings, tap Paper Size.
- Select 2×6, and LumaBooth will automatically reformat your template to fit.
8. Preview and Test Your Design
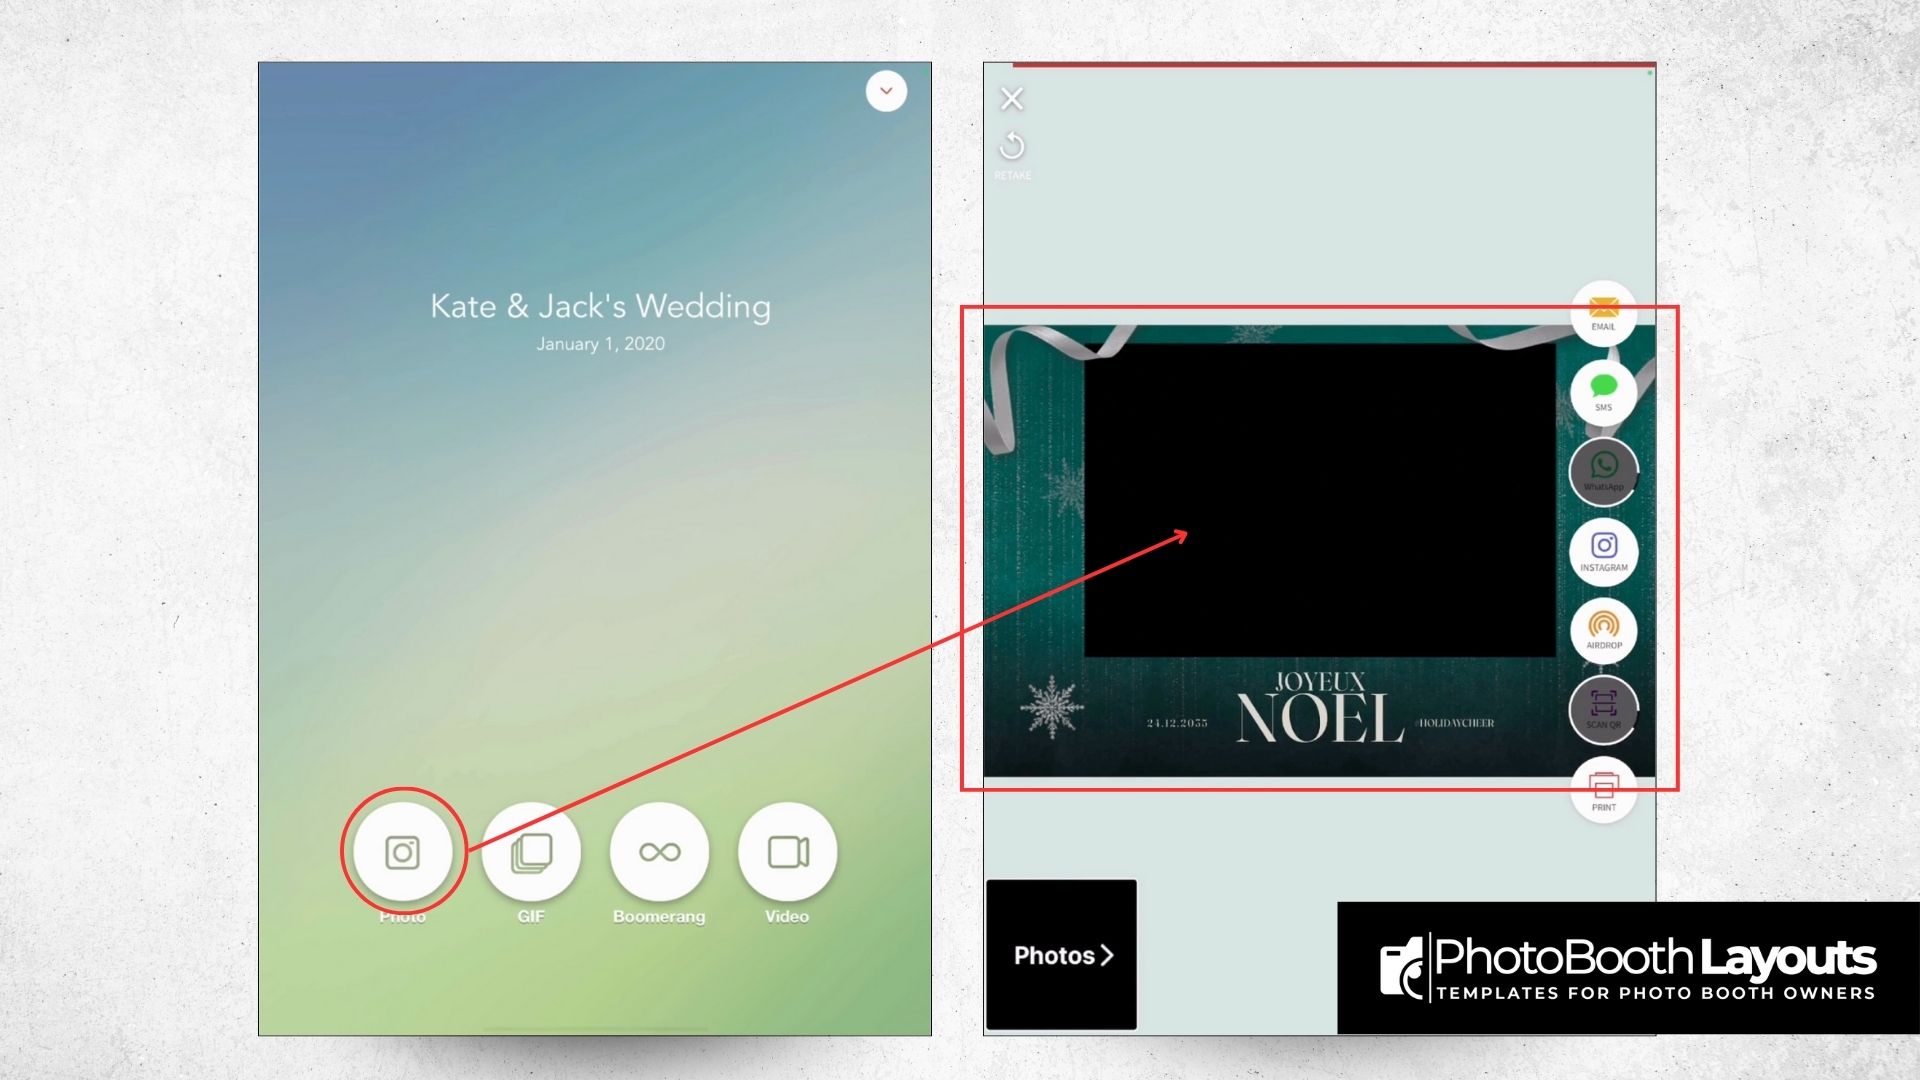
Always test your imported LumaBooth template before the big event to ensure everything looks flawless on your iPad:
- Head to your event’s Welcome or start screen in LumaBooth.
- Tap the Camera icon (or start) and take a few sample photos.
- After printing or previewing, check that your design and text render as intended.
Conclusion
That’s all it takes! Using this LumaBooth template import guide, importing and customizing LumaBooth templates on your iPad is simple and efficient. With these steps, you’ll be able to craft stunning, personalized layouts for every special occasion.
Enjoy creating unforgettable photo booth experiences with your iPad!
